WINDOWS 10 INSTALLATION
- Skilled Career HUB

- Aug 29, 2021
- 3 min read
Windows 10 Installation
Step 1: Upgrade to Windows 10

Download the Windows 10 Media Creation Tool
The Windows 10 download is around 2.5GB and will need to be copied to a blank DVD or a USB flash drive for the installation, so make sure you have something suitable to hand for this.
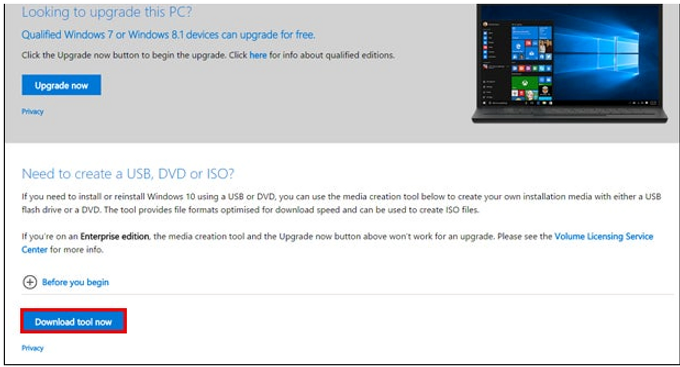
Go to www.microsoft.com/en-gb/software-download/windows10 and click Download tool now. This just downloads a small setup tool that will download the required Windows 10 setup files later.
Step 4: Run the Windows 10 Media Creation Tool

When the download has finished, plug in your USB flash drive or insert a blank DVD in your PC’s DVD drive. Find the downloaded MediaCreationTool.exe file in your Downloads folder and double-click it to run it.
When the Windows 10 Setup window appears, select the Create installation media for another PC option and click the Next button.
Step 5: Choose Your Windows 10 Version
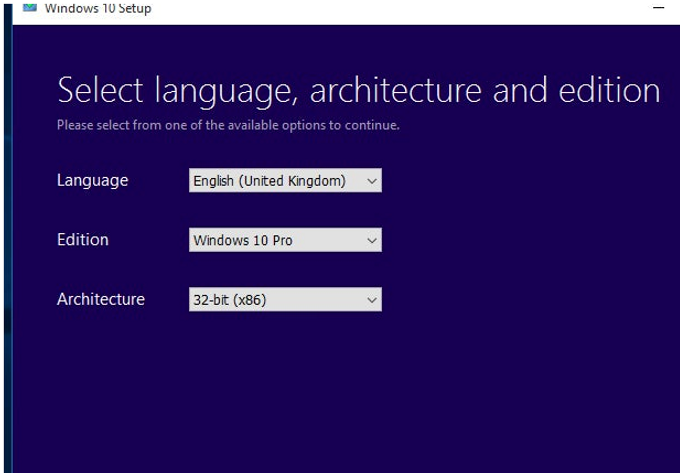
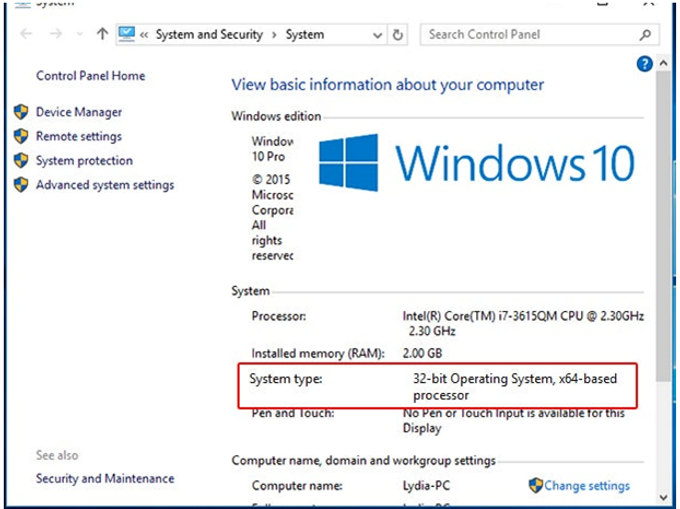
On the next screen, choose the Language, Edition and Architecture (32-bit or 64-bit) to match your current version of Windows 10. Don’t select one of the N editions — these lack Windows Media Player. Click Next to continue.
Step 6: Choose a Storage Device and Start the Download

Select the device you’re going to use for the Windows 10 installation — USB flash drive or an ISO file for burning to DVD. Click Next.
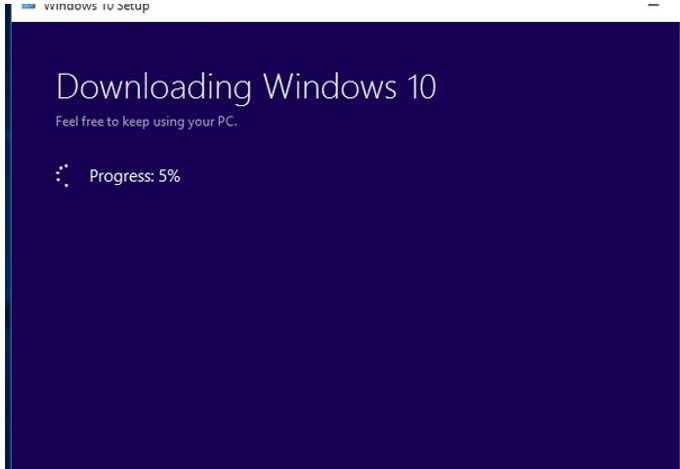
Select the USB flash drive, or a folder on your PC, to store the Windows 10 setup files. Click Next and the 4GB download will begin. If you created a DVD ISO file, you’ll now need to burn the file to a DVD before you can use it to boot your PC. Else you can boot using the USB flash drive.
Step 7: Begin the Windows 10 Installation
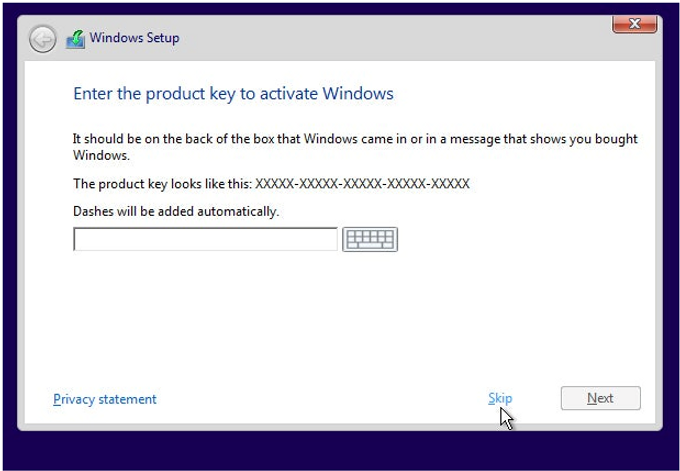
After you boot your PC using the Windows 10 DVD or USB flash drive, choose the Install now option and then Skip the request for a product key to activate Windows. As long as you’ve already upgraded this PC to Windows 10, you won’t need a product key.
Step 8: Perform a Custom Install

When prompted, choose the Custom: Install Windows only (advanced) option. This will erase everything on your existing Windows 10 drive (usually C:), so be sure you’ve backed up everything you want to keep before going any further.
Step 9: Choose Where to Install
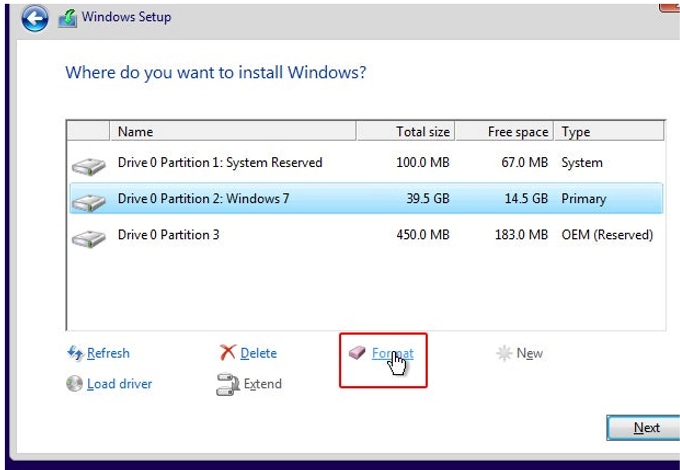
Select the hard drive partition you want to install Windows 10 on. This should already be labelled as Windows 7, 8 or 10, but it should also be the largest partition in the list. If you’re not sure which partition to use, seek help before going any further.
If you’re happy to continue, click the Format option and click OK on the warning dialog box that appears. When the drive format is complete, click Next.
Step 10: Complete the Set Up

The Windows 10 installation will now start. When it’s almost complete, you’ll be asked for a product key again, so click the Do this later option at the bottom of the screen and finish the rest of the set up.
Step 11: Confirm That Windows 10 Has Activated

Once Windows 10 is installed, repeat Step 1 to check that it has been activated — you may need to click the Activate button. You may also need to install the necessary drivers for your PC’s network or Wi-Fi adapter first, since activation requires internet access.
If activation won’t complete successfully, you’ll need to contact Microsoft, explain what’s happened and ask for an activation code. This is inconvenient, but should be straightforward as long as your previous Windows 10 installation was activated.
Comments